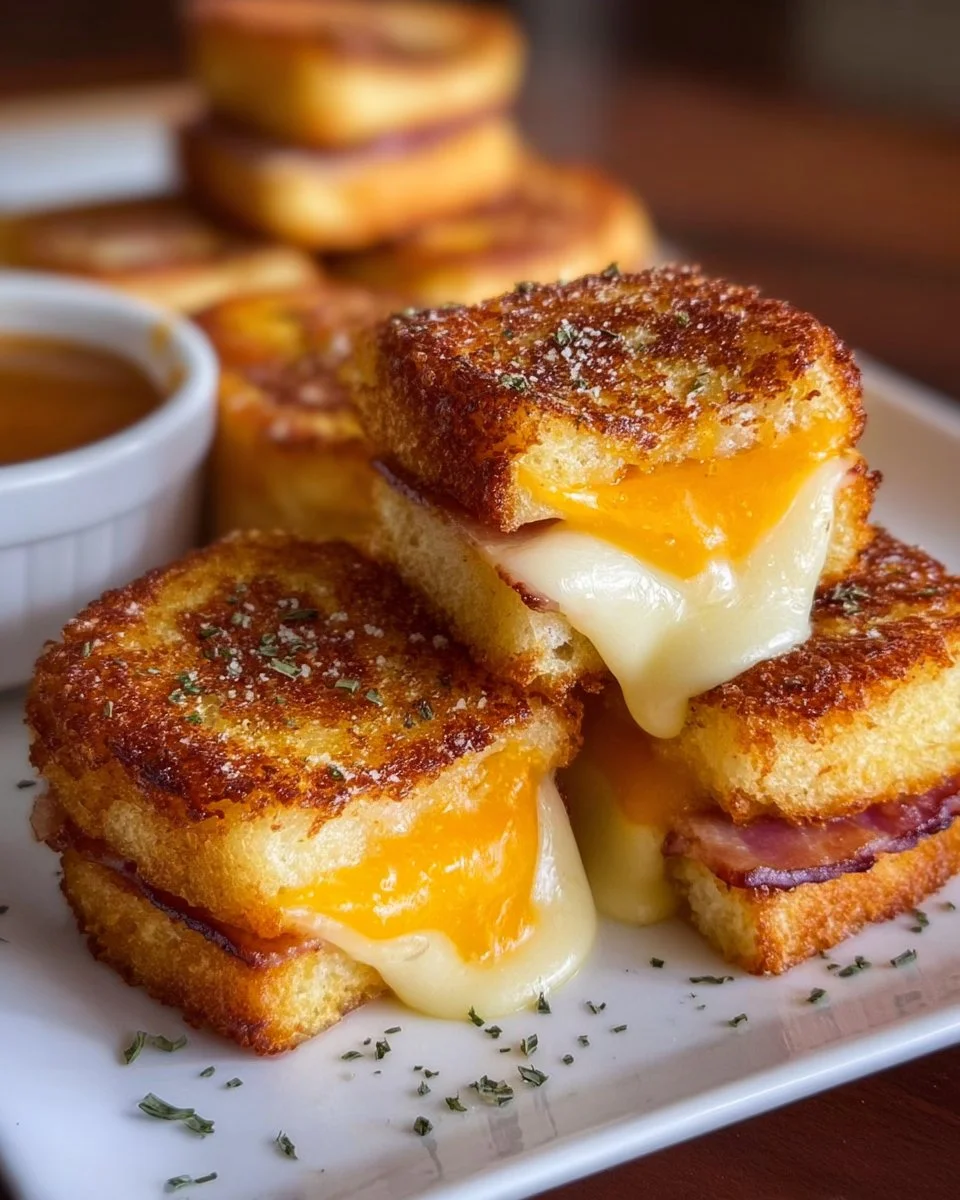
Nothing brings a smile to your face quite like the ooey-gooey delight of a grilled cheese sandwich, especially when presented in a charmingly bite-sized form. Imagine opening your oven door to a wafting aroma of buttery warmth, mingling with the savory scents of melting cheese and a hint of garlic. As you pull out a tray of Mini Grilled Cheese Hawaiian Rolls, the cheese spills over the edges, glistening with buttery goodness, promising a crunch that gives way to a warm, creamy center. These delightful bites invite you to indulge, sparking joy and comfort with every single morsel.
Perfect for any gathering, these mini masterpieces preserve the classic appeal of a grilled cheese but with a sumptuous twist, featuring soft, sweet Hawaiian rolls as the vessel for your cheesy delight. As you take that first bite, the crispy top layer gives way to a buttery softness, while the melted cheese stretches tantalizingly, beckoning you to savor the moment longer. And if you add the optional bacon, the savory aspect only elevates the experience, creating a blend of flavors designed to impress guests or simply cure a craving on a cozy night in.
Why You’ll Love This Mini Grilled Cheese Hawaiian Rolls
You’ll find countless reasons to adore these Mini Grilled Cheese Hawaiian Rolls, whether you’re preparing for a lively gathering or looking to satisfy a particular craving. Firstly, their versatility is unparalleled. You can serve these at parties, game nights, or cozy family dinners, and your guests will be delighted each time. Additionally, they make for a quick and satisfying snack, ideal for any time of the day.
The combination of sweet Hawaiian rolls with rich, melting cheese creates a symphony of flavors dancing on your palate. Adding that crispy, salty bacon enhances this treat, transforming these rolls into an unforgettable appetizer that lingers in taste long after the last nibble. They are not only delicious but also incredibly easy to prepare, making them a go-to recipe for both seasoned chefs and kitchen novices alike.
Preparation Phase & Tools to Use
To whip up these delicious bites of joy, you’ll need just a few essential tools. Here’s what you’ll want on hand:
-
Baking Sheet: A must-have for holding your Hawaiian rolls as they bake. Make sure to choose one with a rim to catch any melted cheese drips.
-
Cooling Rack: If you want your rolls to retain that delightful crunch, allow them to cool on a wire rack after baking.
-
Pastry Brush: Brushing the garlic butter mixture over your rolls ensures a uniform layer of flavor and a beautifully golden finish.
In terms of preparation, gather your ingredients and tools beforehand to streamline the process. The beauty of these rolls lies in how quickly they come together, so being organized will enhance your stress-free cooking experience!
Ingredients for Mini Grilled Cheese Hawaiian Rolls
- 1 pack Hawaiian rolls (12-count): Opt for fresh, soft rolls for the best texture.
- 8–10 slices of cheddar cheese or your preferred cheese: Cheddar melts beautifully, but feel free to experiment—Swiss or pepper jack can elevate the flavor profile.
- 4 tbsp melted butter: This adds richness and flavor.
- 1/2 tsp garlic powder: A subtle kick that complements the cheese perfectly.
- 1/2 tsp onion powder: For that extra depth of flavor.
- 4 slices turkey bacon, beef bacon, or chicken bacon (optional): Adding bacon brings a delightful crunch and savory element.
- 1 tsp dried parsley: Enhances both taste and visual appeal.
- Pinch of salt and pepper: Balances the flavors beautifully.
If you’re aiming for a vegetarian version, simply omit the bacon; these rolls shine on their own, as creamy cheese wrapped in soft rolls!
How to Make Mini Grilled Cheese Hawaiian Rolls
-
Preheat your oven to 350°F; this ensures your rolls bake evenly and develops that golden crust.
-
Slice the entire sheet of Hawaiian rolls horizontally without separating the individual rolls; this maintains structural integrity and keeps all the cheese contained.
-
Lay cheese slices evenly on the bottom half of the rolls, ensuring generous coverage for maximum gooeyness.
-
Add your bacon slices if you’re using them, pressing them gently into the cheese to ensure they stay cozy during baking.
-
Place the top half of the rolls back on, snugging them down over the cheese and bacon, ready for the flavorful butter mix.
-
Mix your melted butter with garlic powder, onion powder, parsley, salt, and pepper in a small bowl until well combined; this fragrant mixture will be the crowning touch for your rolls.
-
Brush the butter mixture liberally across the tops of the rolls; be generous here, as this will create the inviting golden crunch you crave.
-
Cover the baking sheet with foil and bake for 12 minutes. This step helps steam the cheese and achieve the perfect melt.
-
Remove the foil and bake for another 5-7 minutes until the tops turn a brilliant golden brown, hinting at the crispy texture awaiting you.
-
Slice carefully along the seams of the rolls and serve warm. Watch as the cheese oozes out with every cut, inviting eager hands to dig in!
Chef’s Notes & Helpful Tips
-
Make-ahead tips: Prepare the rolls and butter mixture a few hours in advance. Store assembled rolls covered in the fridge, and just pop them in the oven when you’re ready for an appetizer.
-
Cooking alternatives: If you’re short on time, try in an air fryer! Cooking them at 320°F for about 5-8 minutes works wonders. Just keep an eye on them to prevent burning.
-
Customization ideas: Spice things up! Add jalapeños for heat, or mix in a slice of tomato for a fresh burst. Try out different cheeses! Smoked gouda or a sharp white cheddar can add unique flavors to the classic.
Common Mistakes to Avoid
One common misstep is overloading the rolls with too much cheese or bacon. While the urge to be generous is strong, this can lead to spillage and a less-than-desirable mess in the oven. Aim for a balanced filling. Another mistake often made is neglecting the butter mixture—without it, your rolls risk being bland. The perfect golden color and crunch come from that delicious garlic butter you carefully brushed on top.
What to Serve With Mini Grilled Cheese Hawaiian Rolls
Looking for the perfect accompaniments? Here are some delightful pairing ideas to complement your mini rolls:
-
Tomato Soup: A classic pairing, the creamy tang of tomato soup enhances the cheesy experience beautifully.
-
Pickles: Their crunch and tang offer a refreshing contrast that brightens each bite.
-
Vegetable Platter: Crisp veggies provide a palate cleanser; consider carrots, cucumber, and bell peppers for color and crunch.
-
Salad: A citrusy or spinach salad balances out the richness of the rolls while adding freshness.
-
Chips: Opt for kettle-cooked chips for an added crunch that harmonizes with the soft rolls perfectly.
-
Spicy Mustard or Dipping Sauce: A small dish of mustard or aioli provides a zesty twist that will tantalize your taste buds.
-
Fresh Fruit: Juicy strawberries or slices of crisp apple create a sweet contrast that works beautifully with savory dishes.
Storage & Reheating Instructions
To store your Mini Grilled Cheese Hawaiian Rolls, place leftovers in an airtight container in the fridge for up to three days. For longer storage, freeze them in a single layer on a baking sheet, then transfer to a freezer bag for up to three months.
When you’re ready to enjoy again, reheat in the oven at 350°F for about 10 minutes until heated through and the cheese is melty again. For a quicker option, the microwave works, but keep in mind it won’t retain the crunchy texture.
Estimated Nutrition Information
A rough estimate for one Mini Grilled Cheese Hawaiian Roll is around 120 calories, with about 8g of fat and 6g of protein. Keep in mind that adding bacon or heavy cheeses will adjust these values. Always adjust based on ingredient choice and portion sizes.
FAQs
1. Can I make these ahead of time?
Absolutely! You can prepare the rolls and the butter mix ahead of time. Assemble them and keep them in the refrigerator until you’re ready to bake.
2. Can I use a different type of roll?
Yes! While Hawaiian rolls are perfect for their sweetness, feel free to try out other soft rolls like brioche or even slider buns.
3. What’s the best cheese to use?
Cheddar is a classic favorite. However, mozzarella, gouda, or a mixture of your favorite cheeses also work wonderfully.
4. How do I make them vegetarian?
Omit the bacon altogether for a delicious vegetarian option! You can also consider adding spinach or roasted red peppers for added flavor.
5. What if I want to make them spicy?
Add sliced jalapeños or pepper jack cheese for a kick! You could also experiment with hot sauce in the butter mix.
Conclusion
With each Mini Grilled Cheese Hawaiian Roll you take, you indulge in a blissful bite that strikes a perfect balance between rich and comforting. Your kitchen fills with mouthwatering scents that awaken nostalgia while promising satisfaction. So whether you’re exploring new snack options or entertaining friends, this delightful recipe guarantees you a crowd-pleaser every time. Dive into this delicious adventure and meet your new favorite bites today!
Print
Mini Grilled Cheese Hawaiian Rolls
- Prep Time: 15 minutes
- Cook Time: 20 minutes
- Total Time: 35 minutes
- Yield: 12 servings 1x
- Category: Appetizer
- Method: Baking
- Cuisine: American
- Diet: Vegetarian (optional)
Description
Delightful bite-sized grilled cheese sandwiches made with soft Hawaiian rolls and gooey melted cheese, perfect for any gathering.
Ingredients
- 1 pack Hawaiian rolls (12-count)
- 8–10 slices of cheddar cheese (or your preferred cheese)
- 4 tbsp melted butter
- 1/2 tsp garlic powder
- 1/2 tsp onion powder
- 4 slices turkey bacon, beef bacon, or chicken bacon (optional)
- 1 tsp dried parsley
- Pinch of salt and pepper
Instructions
- Preheat your oven to 350°F.
- Slice the entire sheet of Hawaiian rolls horizontally without separating the rolls.
- Lay cheese slices evenly on the bottom half of the rolls.
- Add your bacon slices if using, pressing them gently into the cheese.
- Place the top half of the rolls back on, snugging them down.
- Mix your melted butter with garlic powder, onion powder, parsley, salt, and pepper.
- Brush the butter mixture liberally across the tops of the rolls.
- Cover the baking sheet with foil and bake for 12 minutes.
- Remove the foil and bake for another 5-7 minutes until golden brown.
- Slice carefully along the seams and serve warm.
Notes
Make-ahead: Prepare rolls and butter mixture a few hours in advance. Store covered in the fridge until ready to bake.
Nutrition
- Serving Size: 1 roll
- Calories: 120
- Sugar: 3g
- Sodium: 300mg
- Fat: 8g
- Saturated Fat: 4g
- Unsaturated Fat: 3g
- Trans Fat: 0g
- Carbohydrates: 10g
- Fiber: 1g
- Protein: 6g
- Cholesterol: 15mg